
High-quality wall preparation for wallpapering determines the durability of the covering and the quality of the renovation. In 2025, the cost of preparatory work ranges from $3-8 per square meter depending on the complexity, but skimping on this stage can lead to expenses of $20-40 for rework. Proper surface preparation before wallpapering includes removing old wallpaper from walls, plastering walls before wallpapering, and priming walls for wallpaper. Step-by-step preparation for wallpapering requires adherence to wall preparation techniques and maintaining an optimal temperature regime during the process.
It should be noted that modern wallpapers are like surgical tools for walls. They ruthlessly reveal every surface imperfection.
Assessing Wall Condition and Planning Work
Preparatory work before wallpapering begins with a thorough inspection of the surface. A simple test can help determine the quality of the base. Stick a piece of painter’s tape to the wall and rip it off sharply. If particles remain on the tape, additional cleaning of the walls from old coverings is required.
In my experience working with private clients, this stage is often underestimated. Homeowners think that wallpaper will hide minor defects. That’s a mistake.
“Over 15 years of work, I’ve realized: an hour of preparation saves a day of rework. A client from New York saved on primer — a month later, the wallpaper peeled off in patches. They had to re-wallpaper an entire 25 sq.m. living room. Additional costs amounted to $380 instead of the initial $45 for primer.” - John Smith, finishing specialist
Removing Old Wall Coverings
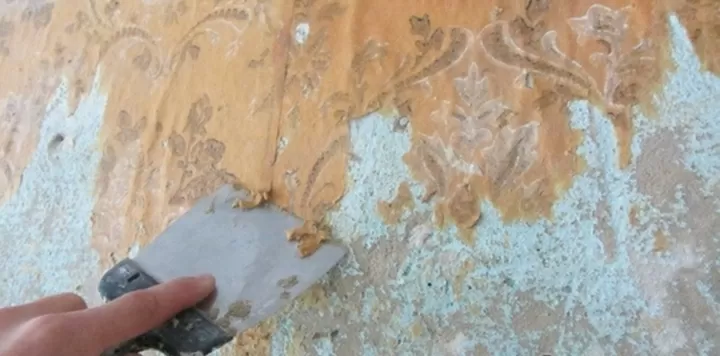 Removing old wallpaper from walls is the first critical step. Paper wallpapers are soaked with warm water mixed with liquid soap. Modern vinyl wallpapers require a special approach.
Cracks and unevenness are addressed after the complete removal of the covering. Large defects are filled with plaster, while smaller ones are treated with putty. This ensures a perfectly smooth surface.
Scraping paint off walls depends on the type of coating. The choice of method determines the success of the entire process:
- Water-based paint — washes off with warm water
- Oil-based paint — requires mechanical removal
- Acrylic paint — removed with special solutions
The process requires patience and the right tools for wallpapering preparation. Removing old coverings cannot be ignored — it’s the foundation of a quality renovation. Each type of paint has its own removal specifics, which affect the final result of surface preparation.
Materials for Wall Preparation for Wallpapering
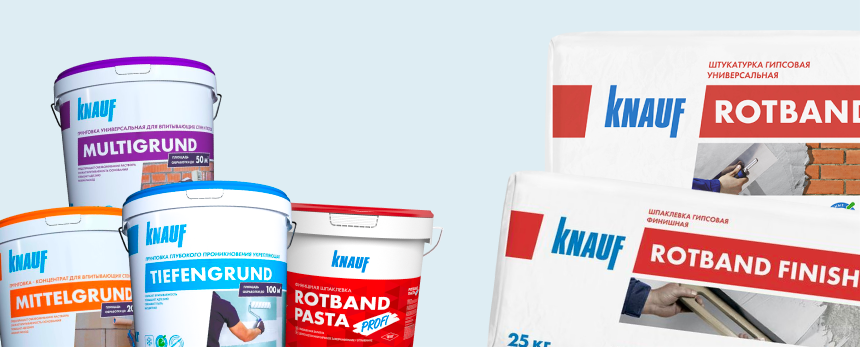 What’s needed for wall preparation is a common question among beginners. The basic set includes deep-penetration primer, putty for interior work, and antiseptic treatment. Bear in mind that modern wall preparation materials significantly simplify the process even for non-professionals.
The choice of materials depends on the type of base and the planned wallpaper. Special attention should be paid to moisture protection, especially in high-humidity areas.
Accurate material calculations help avoid unnecessary expenses. Consumption rates per 1 m² according to technical specifications:
- Primer: 0.1-0.15 liters
- Base putty: 1-1.5 kg
- Finish putty: 0.5-0.8 kg
- Wallpaper adhesive: 0.04-0.08 kg of dry mix (depending on wallpaper type)
Proper material calculation eliminates the need for additional purchases during the process. The choice of materials for wall preparation affects the durability of the covering and the cost of wall preparation for wallpapering.
Each type of base requires an individual approach when selecting compounds. Technical specifications of materials and their drying times are presented in the table:
| Base Type | Primer | Putty | Drying Time |
|---|---|---|---|
| Concrete | Deep-penetration acrylic | Gypsum base | 6-8 hours |
| Brick | Strengthening with quartz sand | Cement base | 8-12 hours |
| Drywall | Universal adhesive | Polymer finish | 4-6 hours |
| Plaster | 1:5 concentrate | Gypsum finish | 4-6 hours |
Adhering to recommended drying times ensures quality adhesion of subsequent layers. The right choice of materials reduces the risk of wallpaper peeling, and compatibility between primer and putty from the same manufacturer ensures better coating adhesion.
Safety During Wallpapering Preparation
 Safety is the number one priority. Nevertheless, many ignore basic protective measures, leading to health issues. Basic safety requirements include:
- Protective equipment: FFP2 respirator for dust, FFP3 or gas mask filters for solvents, safety goggles, gloves
- Ventilation: ensure airing every 2 hours of work
- Chemical compounds: study labels, work in a well-ventilated area
- Electrical safety: disconnect power to outlets before removal, use RCD with power tools
- Grounding: mandatory when working with water-based solutions and power tools
Comprehensive safety measures protect health and ensure work quality. Adhering to safety measures is especially important when working with solvents and abrasive materials, as neglecting protection can lead to serious consequences. In recent projects, I’ve noticed that ignoring basic safety requirements causes respiratory issues and allergic reactions in workers. Temperature restrictions: work at temperatures below +5°C is not recommended.
Wall Leveling Before Wallpapering
 Wall puttying before wallpapering is done in two stages. The base layer eliminates large unevenness up to 5 mm deep.
The finish layer creates a perfectly smooth surface. Proper wall preparation for wallpapering requires adherence to mixing proportions. On one of the recent renovation sites, a client tried to save on finish putty — the result was disastrous.
Accurate proportions are the key to quality. Recommended ratios for putty mixes:
- Gypsum putty: 1 kg of dry mix per 0.4-0.5 liters of water (working time 20-40 minutes)
- Polymer putty: 1 kg per 0.35-0.4 liters of water (working time 60-90 minutes)
- Interlayer drying: minimum 4-6 hours between layers
Violating proportions leads to cracking or peeling of the putty. Wall plastering for wallpapering is necessary for unevenness exceeding 5 mm; modern compounds allow leveling the surface in one pass. A test wallpapering of a small section is mandatory to check adhesion.
Correct component ratios are the foundation of coating durability.
The process is complex. The result is excellent.
It's well known that the quality of wall surface sanding affects the final result. Use P80 grit abrasive for rough cleaning, P120 for intermediate processing, and P220-P320 for final preparation for thin wallpapers.
Wall Surface Priming
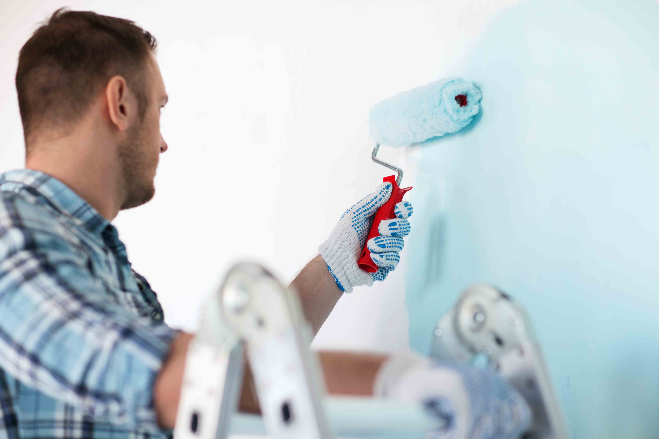
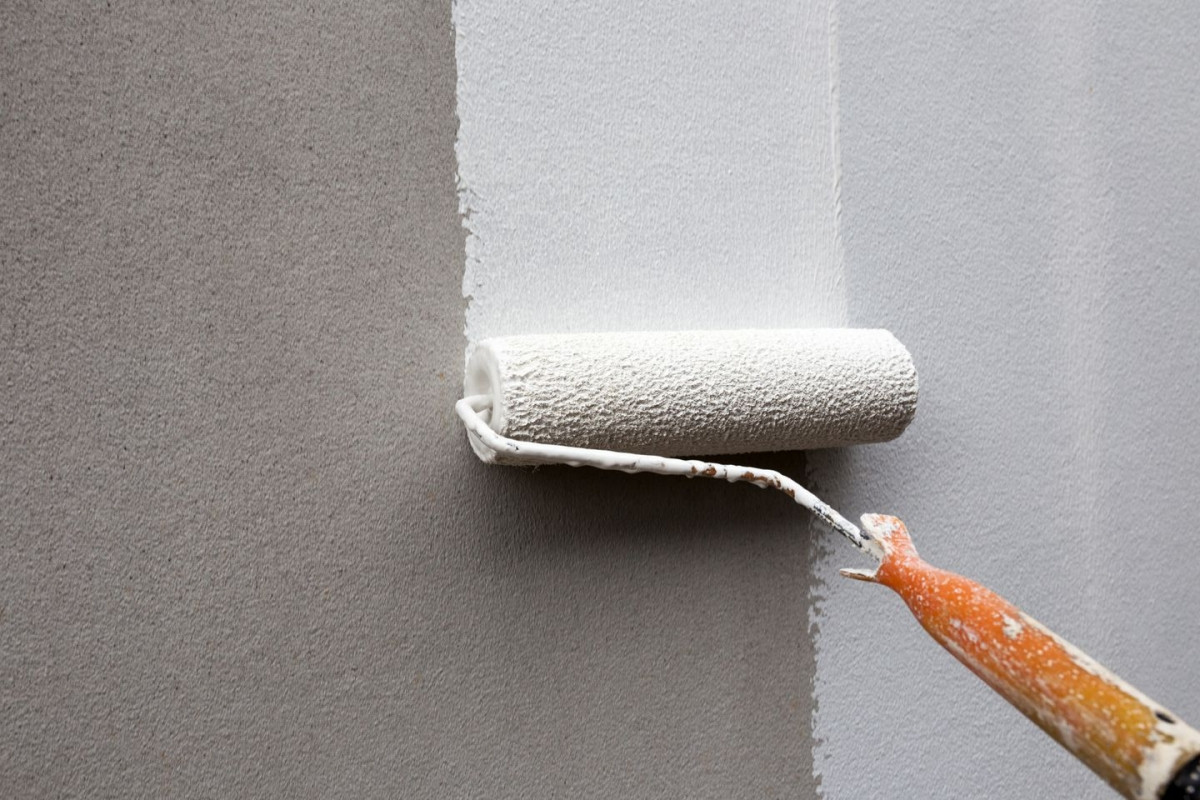 Priming walls for wallpapering is a mandatory step in proper wall preparation. The compound is applied with a roller from bottom to top, ensuring even coverage.
“Primer works like a makeup primer — it creates an ideal base for applying the covering. Without it, even the most expensive wallpapers can peel off.”
At one site last season, skipping priming led to stains on light-colored wallpapers. The entire wall had to be redone.
Tools for Wallpapering Preparation
A professional toolset speeds up work threefold. Is it worth saving on tools? Definitely not, if you value your time. Key items include:
- Spatulas of 10, 20, 40 cm width
- Rollers with varying pile lengths
- 2-meter aluminum rule
- Building level
- Sandpaper P80, P120, P220-P320
- Power tools with RCD
- Moisture meter for checking base humidity
Quality tools are an investment in results and work speed. Cheap alternatives often leave streaks and require additional passes, increasing the cost of preparatory work. Professional equipment pays off through time savings and improved surface quality. Learn more about choosing between professional installation and DIY from homeowners’ practical experiences.
Temperature Regime and Microclimate
The temperature regime during wallpapering is critically important. Optimal parameters: temperature 18-23°C, room humidity during renovation not exceeding 50-55%. Taking into account the structural features of the room, additional humidification or dehumidification may be required.
Draft protection during wallpapering is ensured by closing windows and doors. It may seem trivial, but drafts cause a significant portion of wallpapering defects, according to practical observations.
In one of my recent projects, ignoring climatic conditions led to uneven adhesive drying. The result — waves on wallpapers costing $800. Hiring professionals for wall preparation would have been cheaper.
Wall Preparation Technology for Different Wall Types
The stages of wall preparation for wallpapering vary depending on the base material. New drywall requires only priming and light puttying of joints. Old plastered walls need a full preparation cycle.
“Every wall tells its own story. An experienced craftsman reads it like a book — through cracks, stains, and unevenness. This helps choose the right preparation strategy.” - Mikhail Petrov, finishing specialist with 20 years of experience
How to prepare walls for wallpapering in a bathroom? Antiseptic treatment and moisture-resistant compounds are mandatory. As a matter of fact, bathrooms often require wall preparation services for wallpapering due to specific operating conditions.
In practice, I often notice this aspect being underestimated. Step-by-step preparation for wallpapering in humid areas includes additional joint waterproofing. Wall preparation specialists recommend using special primers with antiseptic additives.
Preparation in Challenging Conditions
How to properly prepare walls for wallpapering in non-standard situations? Each case requires a tailored approach. Preparation features in challenging conditions are often underestimated by DIYers.
New construction with wet plaster:
Wall moisture should not exceed 4-6% for concrete and brick, 1% for drywall. Use a moisture meter for control; if norms are exceeded, additional drying for 2-3 weeks is needed. Generally speaking, haste in new constructions is costly.
Re-wallpapering over old whitewash:
Whitewash must be completely removed with a scraper and the surface washed. Lime residues prevent adhesive from bonding properly with the wall. Cleaning walls from such old coverings is labor-intensive but necessary.
Uneven walls without major leveling:
For deviations up to 10 mm, use thick non-woven wallpapers with a density of 120 g/m² or higher. They partially hide unevenness but are not a full substitute for quality preparation.
Wall preparation for wallpapering in such conditions requires extra time and materials, but the result is worth it. In practice, I notice that neglecting the specifics of challenging surfaces leads to most complaints and the need for rework.
Quality Control of Preparation
Final inspection includes a visual check under side lighting.
A 2-meter rule will help detect unevenness exceeding 2 mm. The surface should be uniform in color and texture.
Proper wall preparation for wallpapering is considered complete when all technological requirements are met. Saving time at this stage will lead to problems in the future.
Preparation Stages Scheme
Systematic inspection is the foundation of quality. The sequence of control operations includes:
- Condition assessment → tape test, unevenness measurements
- Removal → removing old coverings, cleaning
- Leveling → plastering, base putty
- Finishing → finish putty, sanding
- Priming → applying primer in 1-2 layers
- Quality control → checking with a rule, lighting
Skipping any stage reduces the quality of the final result. Therefore, wall preparation technology must be strictly followed, especially when planning to use expensive wallpapers.
Wallpapering Readiness Checklist
 Readiness for wallpapering is determined by several criteria. Check before starting:
- Old covering completely removed
- Cracks and unevenness filled
- Surface sanded (P220-P320 for thin wallpapers)
- Primer applied and dried (check by touch)
- Walls dry and clean
- Temperature 18-23°C, humidity up to 55%
- Tools and materials prepared
- Room protected from drafts
- Test wallpapering conducted (recommended)
- Material compatibility checked
Each point is critical to success. Crack and unevenness treatment allows no compromises — even the smallest defects will show after wallpapering. As I always tell my clients, it’s better to spend a day on preparation than a month fixing mistakes. Acceptable deviations: no more than 2 mm per 2 meters of rule length.
High-quality wall preparation for wallpapering is the foundation of a durable and beautiful covering. Adhering to technology, using the right materials and tools, guarantees a professional result. Remember: time spent on preparation pays off with years of flawless wall appearance.