Wall leveling with your own hands is a task every homeowner faces. Unevenness ruins the appearance. Reduces the quality of renovations by tens of percent. According to construction company statistics, 85% of apartments have walls with vertical deviations exceeding 5 mm, which is critical for quality finishing, especially when laying tiles costing $40-80 per square meter.
Modern wall leveling technologies allow defects to be corrected without hiring professionals. Savings can reach $800 for a 15 m² room. According to QTO Construction, proper application of leveling methods is the foundation of quality construction, like a foundation for a perfect home. It’s worth noting that the right choice of method depends on the degree of wall unevenness and the type of final finish.
"In my work with private clients, I notice the most common mistake is trying to level heavily uneven walls with putty. It’s like trying to fix a broken bone with a bandage." — Michael Johnson, a construction contractor with 15 years of experience.
The global market for wall leveling materials reached $12.5 billion in 2024, with an annual growth of 4.2%. The popularity of the DIY approach is growing: 65% of homeowners in the US prefer to perform such tasks themselves.
How to Level Walls in an Apartment: Assessing Surface Condition
 Determining the degree of unevenness is the first step to success. Use a 2-meter-long spirit level, applying it to the wall in different directions. Measure the maximum gaps between the level and the surface.
The assessment technique includes three stages: horizontal checking, vertical diagnostics, and corner control. This way, you’ll get a complete picture of the upcoming work and can choose the optimal wall leveling method.
In practice, I often notice that beginners underestimate the importance of this stage. Accurate measurements help avoid material overuse. The correct methodology is the key to the success of the entire beacon-based wall leveling project.
| Wall Deviation | Leveling Method | Materials | Work Duration | Cost per m² |
|---|---|---|---|---|
| 0-3 mm | Finishing putty | Finishing mix, primer | 1-2 days | $8-12 |
| 3-20 mm | Plaster with beacons | Gypsum/cement plaster, beacons | 3-5 days | $15-25 |
| 20-50 mm | Thick-layer plaster | Cement mix, reinforcing mesh | 5-7 days | $25-40 |
| Over 50 mm | Drywall on a frame | Drywall sheets, profiles, insulation | 2-3 days | $30-45 |
This table will help determine the optimal leveling method based on your walls’ condition and budget.
Wall Leveling Methods: Wet and Dry Techniques
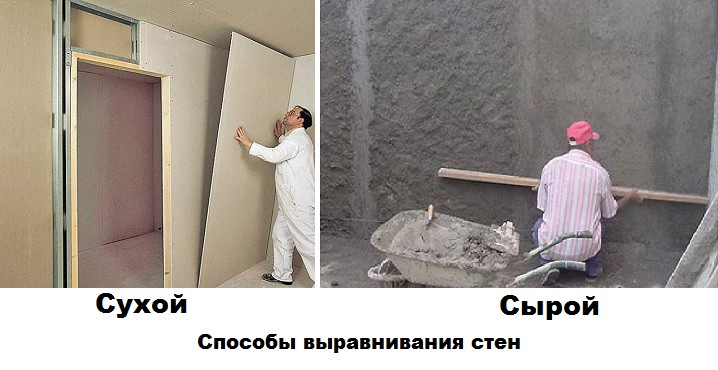 There are two main approaches to correcting unevenness. Wet wall leveling with plaster. Dry wall leveling with drywall — each method has its advantages and limitations, which are important to know in advance.
The wet method is suitable for deviations up to 50 mm. Saves space, creates a durable surface. Requires drying time and some application skills, but the result lasts for decades.
Important: According to American ASTM C926 standards, the maximum plaster layer thickness without reinforcement is 13 mm (1/2 inch) for interior work. European DIN 18550 standards recommend reinforcement for layers thicker than 15 mm. This ensures the coating’s durability for 25-30 years.
The dry method is versatile for any deviations, easy to execute, allows hiding utilities, but reduces usable room space by 5-10 cm on each side.
Optimal Conditions for Leveling Work
Temperature and humidity conditions are critical for the result’s quality. The optimal air temperature is +18...+25°C, relative humidity — 60-70%. Plastering work is not performed below +5°C due to the risk of disrupted hardening processes.
Tip: The best time for wall leveling is late spring and early autumn, when stable temperatures and moderate humidity ensure even material drying. Primer drying time is 2-4 hours for acrylic compositions and 6-12 hours for deep-penetration primers.
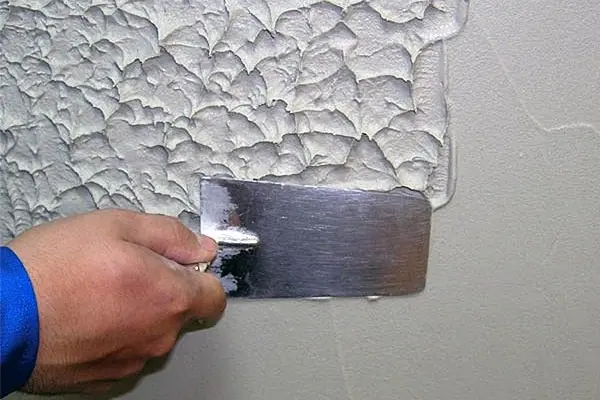
Wall Leveling with Plaster: Step-by-Step Instructions for Wall Leveling
 Wall preparation for leveling is a critically important stage. Completely remove old coatings. Clean loose areas, dust the surface to perfect cleanliness. Priming walls before leveling ensures reliable material adhesion for years.
Features of Working with Different Wall Types
Each type of base requires an individual approach. Not everyone knows these nuances. Achieving maximum plaster leveling quality depends on choosing the right technology for the specific wall material.
Brick walls: Clean joints from mortar residue to a depth of 5-10 mm. Optimal adhesion is your goal. Use cement-sand plaster for wall leveling or gypsum mixes with enhanced adhesion, always applying a deep-penetration primer for coating durability.
Concrete surfaces: Treat with a contact primer like "Betokontakt." Creating roughness is the key task. In one recent project, smooth concrete required notches every 3-5 cm for reliable plaster adhesion for wall leveling.
Wooden walls: Treat with antiseptics and fire retardants. Attach a metal plaster mesh with 10×10 mm cells. Use cement-sand mixes or specialized gypsum mixes for wood, as regular gypsum can cause fastener corrosion in humid environments.
Important: For wooden surfaces, the plaster layer thickness should not exceed 12-15 mm due to differences in material thermal expansion. Exceeding this limit may lead to coating cracking.
It’s worth noting that for concrete surfaces, use a deep-penetration primer, for brick walls — a universal adhesion primer.
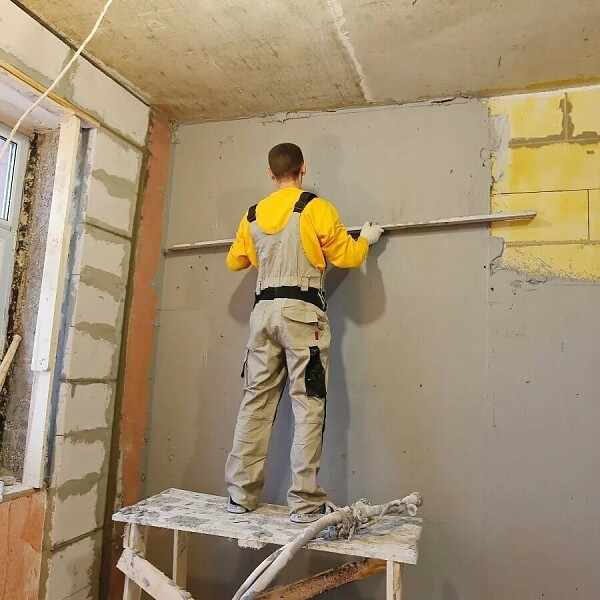
Installing Beacons for Wall Leveling
 Beacons for wall leveling are a guarantee of a flat surface. Proper installation of guide elements requires patience. Following a specific sequence of actions ensures perfect beacon-based wall leveling results even for beginner craftsmen.
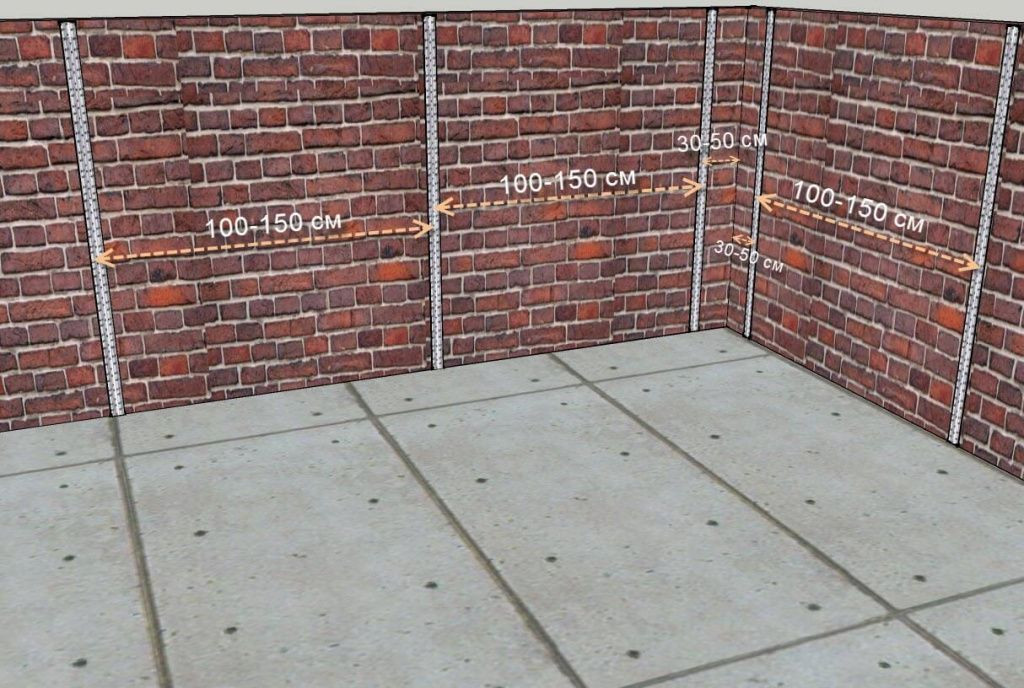
- Marking vertical lines — step back 30 cm from corners, draw lines with a 1.2-1.5 meter interval
- Identifying the most protruding point — find the wall’s most protruding spot to calculate layer thickness
- Fixing end beacons — install guides at corners, checking verticality with a level
- Stretching control strings — stretch cords between end beacons at three height points
- Installing intermediate beacons — set remaining guides along stretched cords
Wall leveling technology requires precision in guide installation. Fix beacons with fast-setting gypsum mix. It’s known that the distance between beacons should be 20 cm less than the rule’s length for ease of work.
Applying Plaster with Beacons
Prepare the mix according to the manufacturer’s instructions. Apply the mix from bottom to top, filling the space between beacons. Move the plastering rule in zigzag motions, removing excess.
Drying times for plaster mixes vary depending on the binder type and conditions:
- Gypsum mixes: setting in 45-60 minutes, strength gain in 24-48 hours for a 10 mm layer
- Cement mixes: setting in 2-4 hours, full hardening in 28 days (working strength in 7 days)
- Lime-sand mixes: setting in 6-8 hours, carbonation in 14-21 days
Professional tip: After each plaster layer thicker than 10 mm, apply an intermediate primer layer. This significantly improves subsequent layer adhesion, prevents delamination, and ensures more even drying. Especially important for multi-layer applications.
At +20°C and 60% humidity, each additional 5 mm of thickness increases drying time by 1.5 times. In cold weather (+10°C), the time doubles.
It’s known that the right consistency is key to quality. Prepare small batches for gypsum mixes, as they set quickly.
"The most important detail when working with plaster is not trying to fix everything in one pass. It’s better to apply two thin layers than one thick one that will crack during drying." — advice from master Alex Rodriguez.
Wall Leveling with Drywall: Framed and Frameless Methods
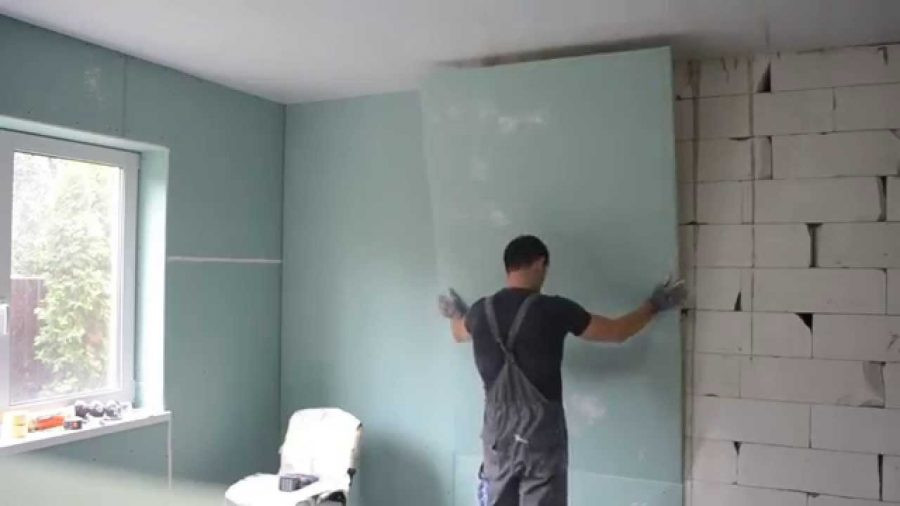 The framed method is suitable for walls with large deviations. Assemble a frame from CD and UD metal profiles. Secure with dowels to the wall and floor at 60 cm intervals to ensure the reliability of the drywall wall leveling structure.
The frameless method is used for deviations up to 20 mm. Simplicity is its main advantage. In one project last season, drywall adhesive for wall leveling allowed work to be completed twice as fast as the framed method.
Considering the room’s structural features, choose moisture-resistant drywall for bathrooms and kitchens, fire-resistant — for boiler rooms and technical spaces.
Modern Eco-Friendly Materials
2025 trends in wall leveling focus on eco-friendliness and energy efficiency. Popular choices include:
- Clay plasters: 100% natural, regulate air humidity, last up to 50 years
- Recycled fiber drywall: contains up to 25% recycled material
- Lime mixes: have antibacterial properties, carbon-neutral
Eco-tip: Choose materials with GREENGUARD or similar environmental certifications. They ensure better indoor air quality and reduce environmental impact.
Materials for Drywall Wall Leveling
Quality results depend on the right material choice. Professional builders recommend using a proven set of components. Considering the structural features of modern buildings, the list of materials for wall leveling includes the following essential elements:
- 12.5 mm thick drywall sheets — standard size for wall structures
- CD and UD metal profiles — for creating a frame system
- 25 mm metal screws — for attaching sheets to the frame with a 25-30 cm interval
- Dowels for frame fixing — ensure secure attachment to the base
- Joint putty — creates a monolithic surface
- Reinforcing tape — prevents cracks at joints
According to recommendations from The Spruce, proper screw spacing is critical for strength. Don’t forget about wall leveling tools. You’ll need: a screwdriver, utility knife, drywall plane, level, tape measure, plumb line for perfect results.
Wall Leveling Tools: Master’s Basic Kit
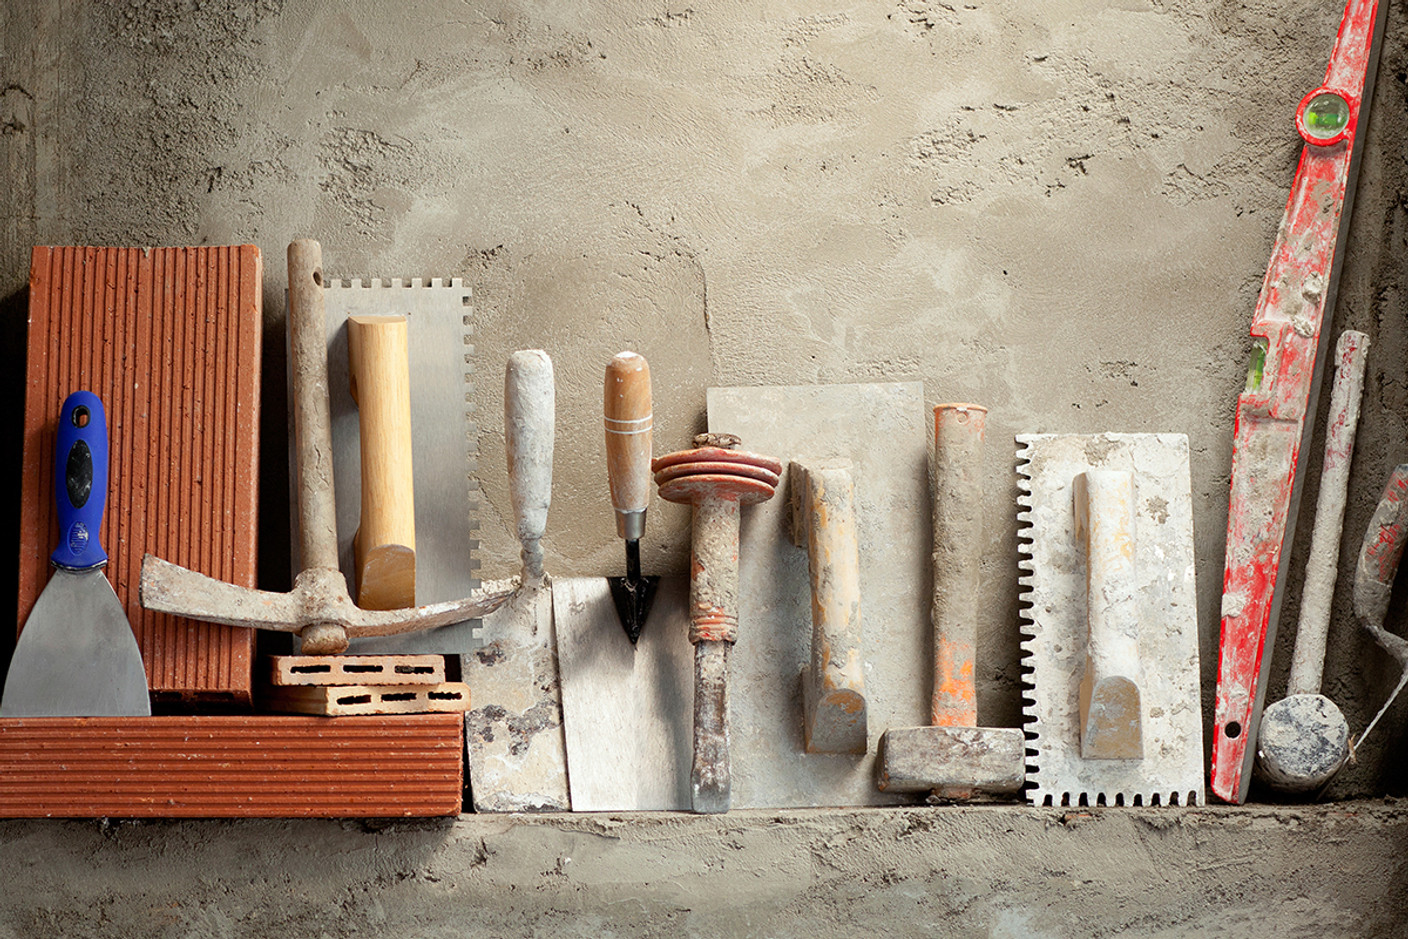 A quality tool is half the success of any project. For plastering, specialized tools are needed. A 2-meter aluminum rule, leveling spatulas 100, 200, and 350 mm wide, a trowel, and a sanding float are the minimum kit for achieving professional results.
For drywall work, the list expands. A profile punch, edge plane. A needle roller for perforation, tape measure, and spirit level complete the set of tools needed for quality DIY wall leveling.
| Tool | Purpose | Price, $ | Necessity |
|---|---|---|---|
| Laser level | Marking horizontals and verticals | 80-150 | Very important |
| 2m rule | Plaster leveling | 25-40 | Mandatory |
| Wide spatula | Applying and smoothing mixes | 15-25 | Mandatory |
| Construction mixer | Mixing solutions | 40-70 | Desirable |
| Plastering float | Surface sanding | 12-20 | Mandatory |
Properly selected tools significantly simplify work and improve result quality.
Wall Preparation for Leveling: Key to Quality Results
 Removing old coatings requires attention to detail. Fully remove wallpapers by soaking with water or special solutions. Remove paint with a spatula or sander.
Check the base’s strength by tapping. A hollow sound indicates delamination, which must be removed. This ensures a reliable base for new materials.
"John, an engineer from Texas, spent only $200 on materials to level a 12 m² room, saving $800 compared to hiring professionals. The key to success was thorough surface preparation and following the technology. ‘Don’t rush and check the level at every stage,’ he shares his experience."
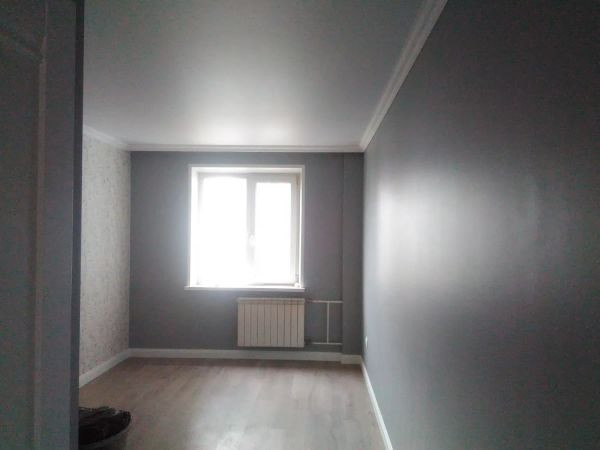
Final Wall Leveling and Puttying
After the plaster dries, the surface is ready for finishing. Wall leveling putty eliminates minor defects and creates a perfectly smooth base for wallpaper or painting.
Use starting putty for initial leveling with a 2-5 mm layer, finishing putty for final smoothing with a 1-2 mm layer. Each layer must fully dry before applying the next.
Leveling Corners and Slopes
Internal and external corners require special attention. Proper corner geometry is key to quality finishing. Thus, wall corner leveling becomes a critical stage of the entire renovation process.
Internal corners: Use a corner spatula for leveling or rule. Apply putty alternately to each side of the corner, checking the 90° angle with a square at each stage of work.
External corners: Reinforce with perforated corner beads. Material — aluminum or PVC. Fix with plaster or putty, constantly checking verticality with a level to avoid deviations.
Window and door slopes: Level with a level and square. Use a 1-1.5 meter rule to control the plane. Slope angles must be strictly 90° to the wall plane.
Professional tip: For perfectly even corners, use a laser level. Project vertical lines on both sides of the corner and level the surface accordingly.
Wall Leveling for Wallpaper
Requirements for surfaces under wallpaper are less strict. Minor unevenness up to 2 mm is acceptable. The material’s texture hides minor defects, but the main condition is the absence of cracks and reliable base adhesion for coating durability.
Wall Leveling for Painting
Painted surfaces require perfect quality. Unevenness becomes noticeable under side lighting. Mandatory final wall leveling with puttying and sanding with P180-P220 abrasive for mirror-smooth surfaces.
perfect quality. Unevenness becomes noticeable under side lighting. Mandatory final puttying and sanding with P180-P220 abrasive.
Mistakes in Wall Leveling: How to Avoid Them
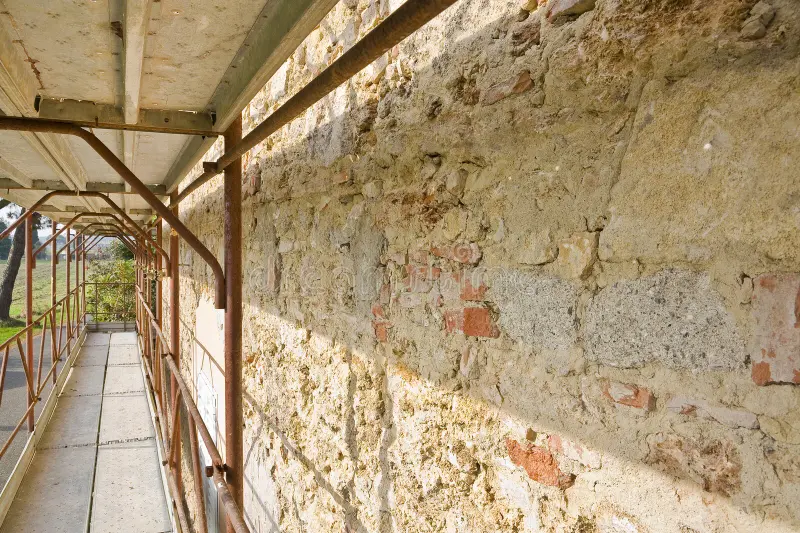
.jpg) The most common beginner mistakes are related to technology violations. The first issue is skipping priming. The result is predictable: coating delamination within months. The second mistake in wall leveling is incorrect mix consistency, leading to uneven drying and cracks.
The most common beginner mistakes are related to technology violations. The first issue is skipping priming. The result is predictable: coating delamination within months. The second mistake in wall leveling is incorrect mix consistency, leading to uneven drying and cracks.
Consider each material’s specifics: too runny a mix flows, too thick is hard to spread. The optimal consistency resembles thick sour cream. No lumps or air bubbles — such a mix ensures perfect base adhesion.
In one project last season, a team tried applying a 4 cm plaster layer without reinforcing mesh. The result was disastrous. A network of cracks appeared within a week, requiring rework with mechanized plaster and reinforcing materials.
Wall Leveling Costs: Economic Aspects
Wall leveling, the cost of which depends on the chosen method, averages $15-40 per square meter for DIY (US prices, 2025). Professional services cost 2-3 times more, but consider initial tool costs ($150-400 for a basic kit).
Material costs account for 60-70% of total expenses, tools — 20-30%, consumables — 10-15%. Real DIY savings are $300-600 for a medium-sized room, factoring in learning time and potential rework for beginners.
Realistic estimate: A beginner needs 5-7 days to level a 15 m² room, including material drying and skill acquisition. A professional completes the same work in 2-3 days, with guaranteed quality.
International Quality Standards and Durability
According to American ASTM C926 standards and Russian SP 71.13330 norms, quality leveling must ensure:
- Permissible deviations: no more than 2 mm per 2-meter rail for high-quality plaster
- Plaster adhesion: at least 0.5 MPa for interior work (per GOST 28013-98)
- Service life: 25-30 years for quality plaster systems, 15-20 years for drywall structures
International experience: In the US, per ASTM C1063, plaster must withstand at least 25 freeze-thaw cycles without visible damage. German DIN 18550 norms require a minimum adhesion strength of 0.8 MPa for exterior work.
DIY wall leveling is a feasible task for a motivated homeowner. The main condition for success is following the technology and realistically assessing your skills. Don’t rush the process and choose quality wall leveling mixes, available in specialized stores. The best leveling method is the one that matches your experience, available time, and specific room conditions.