
In 2025, proper porcelain tile installation becomes a key skill for anyone planning a renovation. The technology of laying porcelain tiles significantly differs from working with regular tiles — much like choosing the right surgeon differs from booking an appointment with a general practitioner. Installing porcelain tiles yourself requires understanding the principles of porcelain tile installation and using specialized materials costing from $15 per square meter.
In practice, I often notice: many homeowners underestimate the complexity of the process. Methods of laying porcelain tiles vary depending on the substrate, but the basic principles remain unchanged. A step-by-step guide to porcelain tile installation helps avoid costly mistakes. After all, porcelain tile flooring lasts for decades with proper installation.
"High-quality porcelain tile floor installation requires strict adherence to technology. Skimping on materials leads to rework in 2-3 years." — a tiling specialist with 15 years of experience
Methods of Laying Porcelain Tiles: Choosing the Optimal Approach
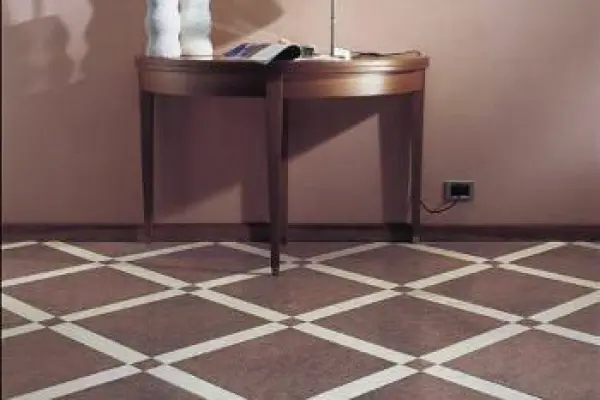
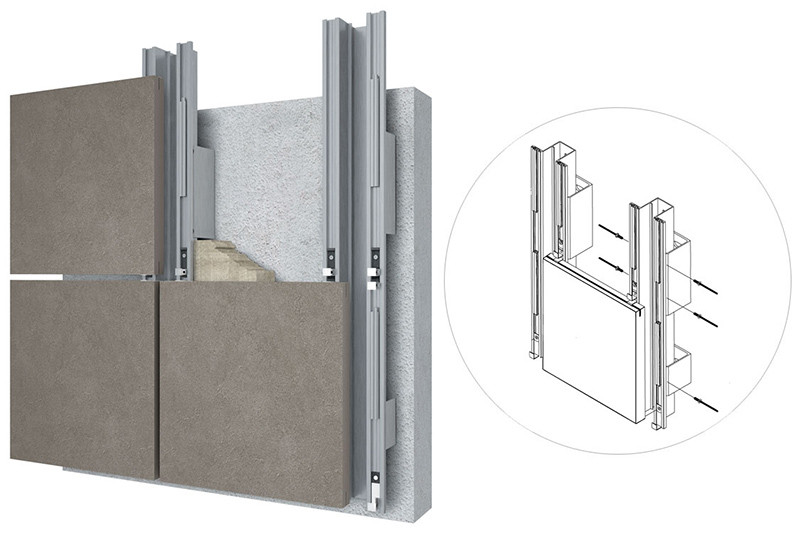 Modern cladding work offers two main methods of porcelain tile installation. The first is installation on ventilated curtain wall systems. The second is traditional porcelain tile laying on floors and walls using adhesive compounds.
Installing porcelain tiles on curtain wall systems is the domain of professionals. However, interior finishing is quite feasible for DIY execution. It’s worth noting that porcelain tile installation technology requires specialized equipment and high-quality construction materials.
Preparing the Substrate for Porcelain Tiles: The Foundation of Success
Preparing the substrate for porcelain tiles is a critically important stage. The substrate must be perfectly level. The allowable deviation is no more than 2 mm over a 2-meter rule. But how do you know if the surface is truly ready for work?
In one recent project, I encountered a situation: the client skipped the leveling stage, trying to save $200. The result was a complete floor redo costing $3,500. Priming before laying porcelain tiles is a mandatory step, especially for porous substrates. It’s not always obvious but critical.
Features of Different Substrate Types
Concrete substrates require dust removal and priming (drying time: 4-6 hours). Wooden substrates are reinforced with moisture-resistant plywood 12-18 mm thick, with a fastening interval of 15 cm. Drywall is treated with a special primer for non-absorbent surfaces. Old tiles are cleaned of wax and degreased. It’s well-known that each substrate type dictates its own rules in this construction process.
- Surface cleaning from dust, oil, and remnants of old coatings
- Checking flatness with a spirit level
- Applying deep-penetration primer
- Leveling the substrate if necessary (drying time for screed up to 40 mm — 14 days, over 40 mm — 28 days)
High-quality substrate preparation determines the durability of the entire covering. Don’t rush this stage.
"My experience has shown: you can’t skimp on substrate preparation. I spent an extra two days leveling the bathroom floor — the porcelain tiles have been lying perfectly for five years now. Meanwhile, neighbors who rushed had to redo it after a year and a half due to cracks in the tiles. Investments in quality preparation pay off handsomely — both in the long term and aesthetically."
Choosing Adhesive for Porcelain Tile Installation
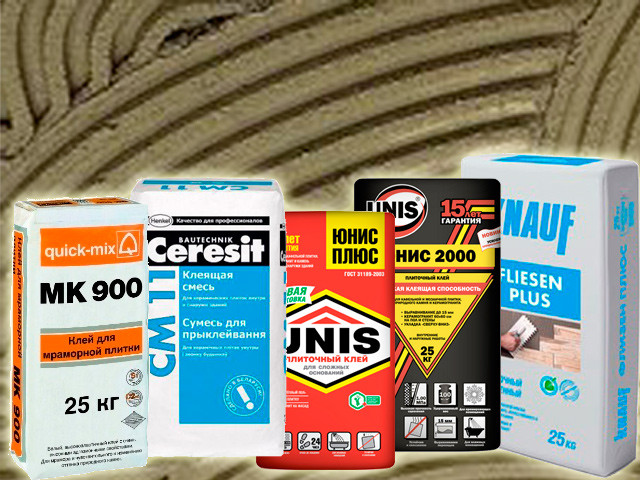 Adhesive for porcelain tile installation fundamentally differs from compounds for regular tiles. The low water absorption of porcelain tiles (typically ≤0.1% for high-quality material) requires the use of tile adhesive for porcelain tiles with enhanced adhesion. Can regular cement mortar be used? Absolutely not.
Thus, cement mortar is categorically unsuitable for these purposes. Tile adhesive for porcelain tiles contains polymer additives that ensure reliable bonding with non-porous surfaces. On one project last season, I observed the consequences of skimping on adhesive — delamination began within a month of use.
Features of Working with Heated Floors
When laying porcelain tiles on heated floors, use elastic adhesives of class S1 or S2. The system must be pre-tested and turned off 48 hours before work begins. The first activation is possible 28 days after installation, with a gradual temperature increase of 5°C per day. Patience is key to success here.
| Adhesive Type | Application Area | Average Price per 25 kg | Trowel Notch Size |
|---|---|---|---|
| C1 (basic) | Interior work, tiles up to 40×40 cm | $12-18 | 6-8 mm |
| C2 (improved) | Large-format porcelain tiles up to 60×60 cm | $18-25 | 8-10 mm |
| C2S1 (elastic) | Heated floors, deformable substrates | $25-35 | 8-12 mm |
| C2TE (frost-resistant) | Exterior work, formats over 60×60 cm | $30-45 | 10-12 mm |
The right choice of adhesive ensures the durability of the covering and trouble-free operation. International standards ISO 13007-1 regulate adhesive requirements for ceramic tiles, ensuring uniform quality criteria.
Tools for Porcelain Tile Installation
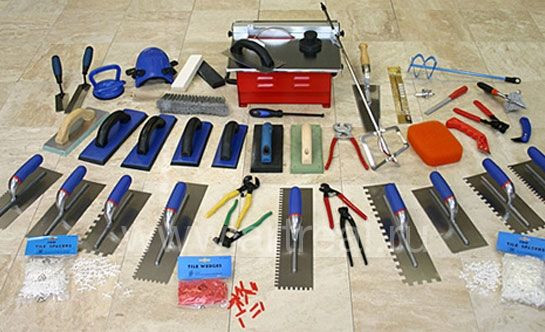 High-quality tools for porcelain tile installation are the key to a professional result. Skimping on equipment results in subpar work. As they say, the stingy pay twice — especially true for renovations and finishing.
- Tile cutter or angle grinder with a diamond blade
- Notched trowel (notch size selected per the table above)
- Rubber mallet
- Spirit level
- Tile spacers for joint alignment
- Tile leveling system (TLS)
Given the structural features of porcelain tiles, a standard tile cutter often fails with material thicker than 10 mm. Professional equipment pays off with cut quality. Experts at This Old House recommend using proven tile installation techniques to achieve professional results.
"Proper layout for porcelain tile installation saves up to 15% of material. Always start from the center of the room — this is the main rule of professionals." — a top-category tiling master
Layout for Porcelain Tile Installation
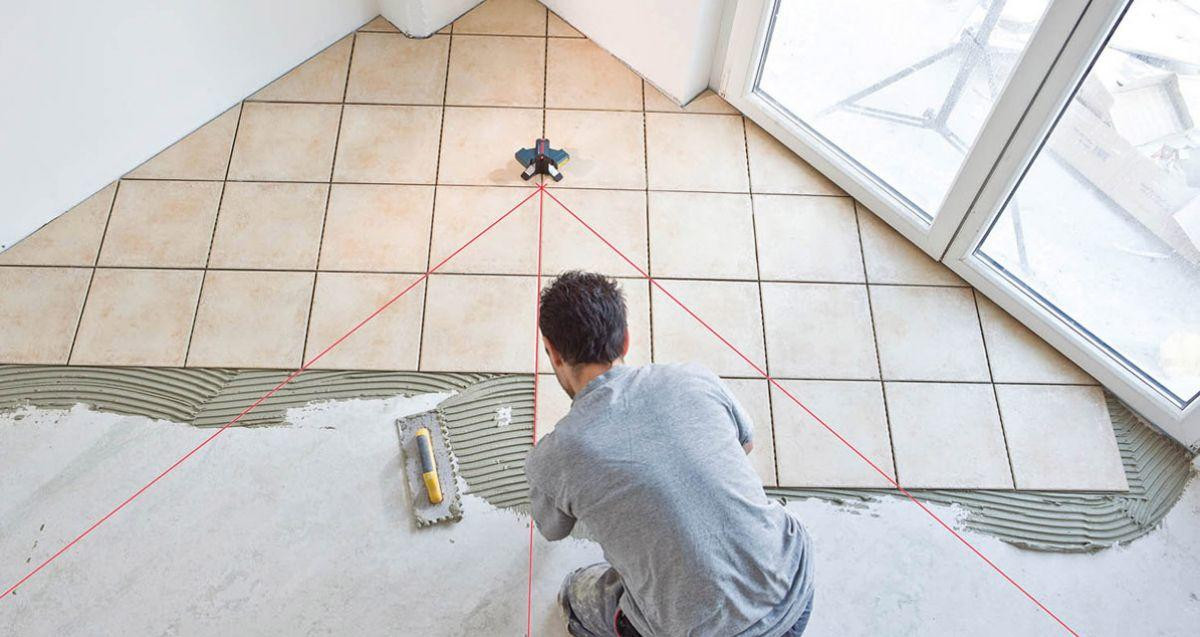 The layout for porcelain tile installation determines the final appearance of the covering. Start by defining the central axis of the room. This is where installation begins — just as a house grows from its foundation.
It’s known that the porcelain tile layout scheme depends on the room’s geometry and tile size. Rectangular rooms use a classic layout, while square rooms use a diagonal one. Proper layout for porcelain tile installation saves up to 15% of material.
Popular Laying Patterns
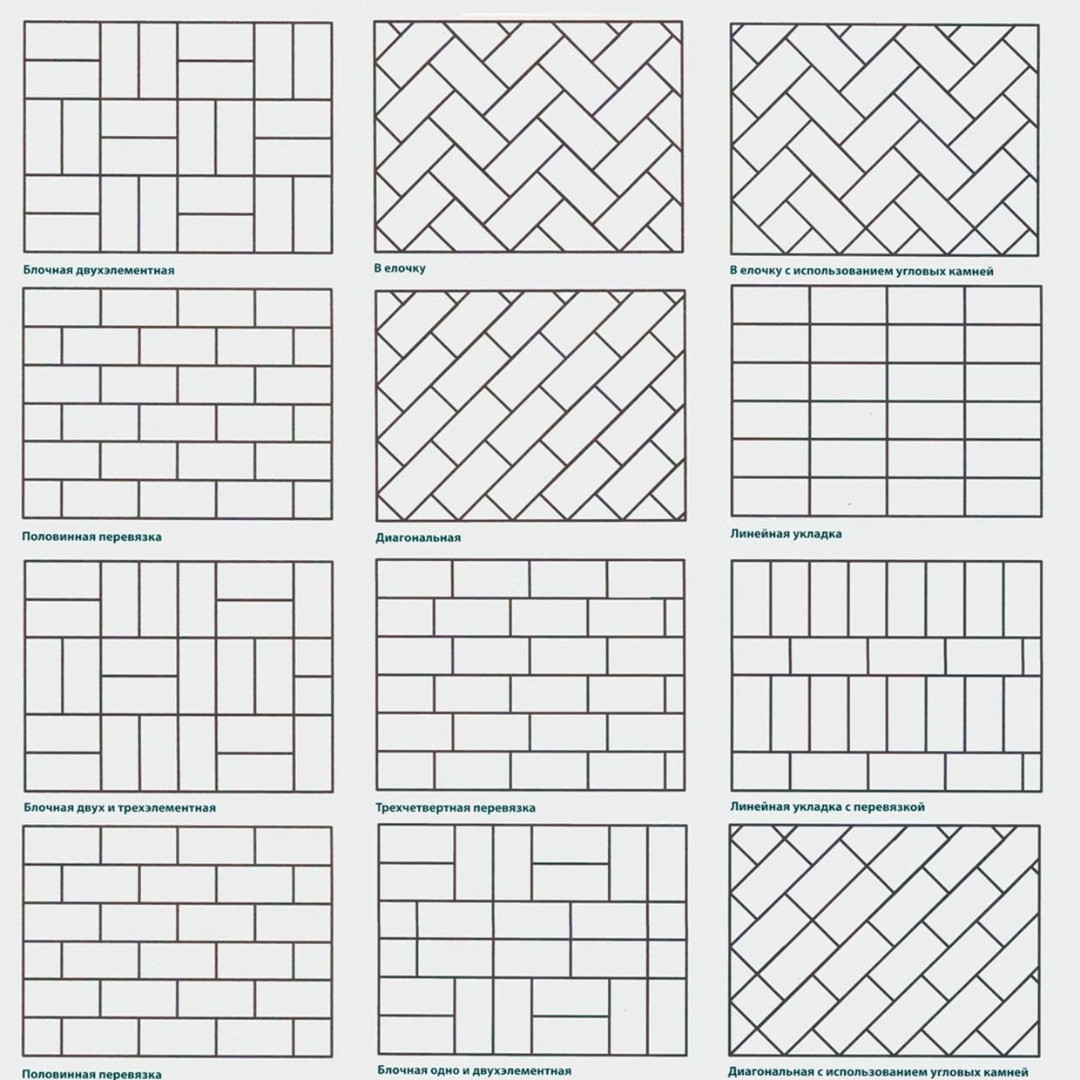
- Classic (straight) — tiles are laid parallel to the walls. Suitable for any room, minimal material waste.
- Diagonal — 45° rotation, visually expands space. Material overrun: 10-15%.
- Checkerboard — alternating two contrasting colors. Requires precise layout.
- Herringbone — for rectangular tiles, mimics parquet. Medium complexity.
- Modular — combination of different sizes. Requires pre-planning.
Porcelain Tile Installation Technology: Step-by-Step Process
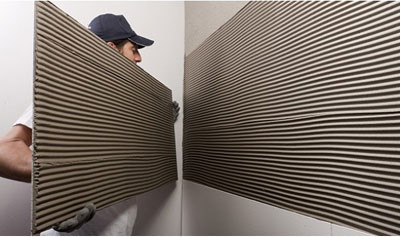
Porcelain tile floor installation begins with applying adhesive. Use the double-buttering method: apply adhesive to both the substrate and the back of the tile. This ensures maximum adhesion.
- Apply adhesive with a smooth trowel (working time with adhesive: 20-30 minutes)
- Spread with a notched trowel at a 60° angle
- Lay the tile with a slight twisting motion
- Tap with a rubber mallet to remove air
- Check the level of adjacent tiles
Porcelain tile installation requires constant horizontal control. Even small deviations of 1-2 mm create unsightly steps. The adhesive layer thickness should be 3-5 mm but can reach 8-10 mm if substrate leveling is needed.
Features of Large-Format Porcelain Tiles
 Porcelain tiles sized 60×60 cm and larger require a special approach. Double adhesive application — on the substrate and tile — is mandatory. Use suction cups to handle heavy tiles. Control substrate deflection — maximum deflection is no more than L/250 (where L is the span length). Adjustment time is reduced to 5-10 minutes due to the tile’s weight.
Tips for Beginners
- Always start laying from the room’s center
- Use a tile leveling system (TLS) — saves time and effort
- Check the level every 2-3 tiles, not at the end of a row
- Protect the tile face with masking tape during cutting
- Soak spacers in water — easier to remove
- Keep a damp sponge handy for immediate joint cleaning
Grouting Porcelain Tile Joints
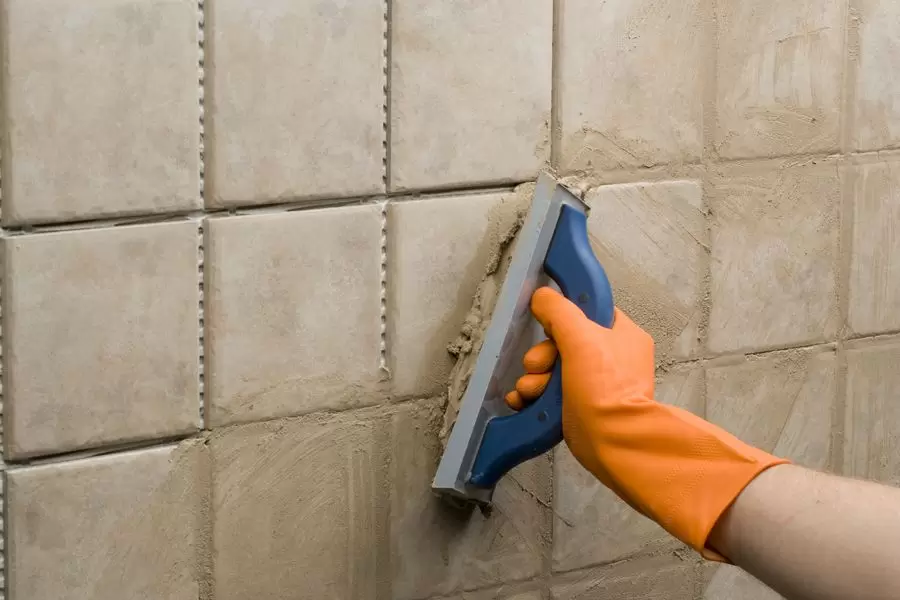 Grouting porcelain tile joints is done 24-48 hours after installation. Don’t rush. Premature grouting can damage unset adhesive.
The choice of grout depends on joint width and operating conditions. Cement-based grout is suitable for 1.5-5 mm joints in dry areas. Epoxy grout is mandatory for wet areas (bathroom, kitchen, pool) and joints wider than 6 mm. Polyurethane grout is versatile but 2-3 times more expensive.
Sealing in Wet Areas
In areas adjacent to bathtubs, shower cabins, or sinks, use sanitary silicone instead of grout. Treat corners and floor-wall junctions. Apply silicone after the grout has fully dried (after 14 days). This prevents moisture from seeping under the tiles.
"Mistakes in porcelain tile installation are costly. The main one is haste. Quality tiling work requires time and patience." — a technical consultant for a major manufacturer
Mistakes in Porcelain Tile Installation
Mistakes in porcelain tile installation happen even to experienced craftsmen. The most common ones are the alphabet of any tiler’s failures. But they can be avoided. Knowing the pitfalls in advance is crucial.
- Using unsuitable adhesive
- Inadequate substrate preparation
- Incorrect layout
- Formation of voids under tiles
- Neglecting expansion joints
Critical Beginner Mistakes
- Lack of expansion joints — in rooms over 20 m² or with a side longer than 6 meters, compensation joints are mandatory
- Laying without acclimatization — tiles must sit in the room for 24 hours before installation
- Working at unsuitable temperatures — optimal range is +15...+25°C at 60-70% humidity; work below +5°C is unacceptable
- Ignoring pattern direction — critical for wood or stone imitation
- Insufficient adhesive drying time — walking before 24 hours can shift tiles
- Incorrect adhesive application angle — hold the notched trowel at 60°, not 90°
In my experience with private clients, I notice a pattern: most issues arise from skimping on materials. A quality result is impossible without quality components. This is especially true for high-class porcelain tile finishing materials.
Professional Porcelain Tile Installation
The cost of professional porcelain tile installation ranges from $8 to $25 per square meter, depending on the region and complexity of the work. In large cities, prices are 30-50% higher. Diagonal laying increases costs by 20%, mosaic patterns by 40-60%. When should you hire an experienced porcelain tile installation professional?
Hiring specialists is justified when working with expensive materials, large-format tiles, or complex room geometry. Professional warranties for cladding work typically last 1-2 years. Porcelain tile installation services include the full cycle — from substrate preparation to final grouting.
Checklist for Installation Preparation
Materials and Tools:
- Porcelain tiles with a 10-15% reserve
- C1-C2 class adhesive (consumption: 3-6 kg/m²)
- Substrate primer
- Grout (cement-based or epoxy)
- Tile spacers or TLS
- Notched trowel (6-12 mm)
- Tile cutter or angle grinder with a diamond blade
- Spirit level
- Rubber mallet
Working Conditions:
- Air temperature +15...+25°C (below +5°C is unacceptable)
- Humidity 60-70%
- No drafts
- Tile acclimatization for 24 hours
- Prepared and dried substrate (moisture content no more than 4%)
- Adequate lighting in the work area
Proper porcelain tile installation is an investment in the durability and beauty of your home. Following the technology and using quality materials guarantees an excellent result for decades to come.